人都是想偷懶的,本篇介紹怎麼程式化發 Pull Reqeust,解決手動上新的版本到 winget 的流程。
微軟 //build 2020 推出 winget 可讓開發人員在 Windows 10 電腦上探索、安裝、升級、移除和設定應用程式。
讓我想要把自己的程式也放到 winget 上,讓其他人也可以直接下載。
要怎麼送程式到 winget 呢?
根據 Submit packages to Windows Packages Manager 介紹,目前 winget 沒有上架的工具,要上程式到 winget 有兩個步驟:
建立一份 manifest,提供程式的說明(作者, 授權, 下載 URL, checksum, … 等)
Create your package manifest manifest 是一份 YAML 描述程式的基本資訊,基本必要資訊如下:
1
2
3
4
5
6
7
8
9
10
11
Id: string # Publisher.package format. (必須是唯一的) Publisher: string # The name of the publisher. Name: string # The name of the application. Version: string # Version numbering format. License: string # The open source license or copyright. InstallerType: string # Enumeration of supported installer types (exe, msi, msix, inno, wix, nullsoft, appx). Installers: - Arch: string # Enumeration of supported architectures. - Url: string # Path to download installation file. - Sha256: string # SHA256 calculated from installer. ManifestVersion: 0.1.0
範例如:
1
2
3
4
5
6
7
8
9
10
11
Id: microsoft.teams Publisher: Microsoft Corporation Name: Microsoft Teams Version: 1.3.0.4461 License: Copyright (c) Microsoft Corporation. All rights reserved. InstallerType: exe Installers: - Arch: x64 Url: https://statics.teams.cdn.office.net/production-windows-x64/1.3.00.4461/Teams_windows_x64.exe Sha256: 712f139d71e56bfb306e4a7b739b0e1109abb662dfa164192a5cfd6adb24a4e1 ManifestVersion: 0.1.0
介紹幾個比較特別的參數:
Silent:可以強迫在安裝過程沒有出現任何需要人為操作的畫面,在 winget 安裝非常適合
SilentWithProgress:功能類似 Silent
Commands:可搭配在安裝時執行特定的指令
更多詳細的 schema 可以參考:Complete Shcema 。
了解 manifest 的格式之後,下面介紹怎麼建立 manifest:
登入 GitHub 帳號
fork winget-pkgs repo 到自己的帳號下
clone 自己帳號下的 winget-pkgs repo 到本機
進入 clone 下來的 manifest 目錄,建立專屬的 {publisher} 目錄,例如:我是 pou lin。如果未來同一個 {publisher} 發多個 apps 都只能放1. 在這個 {publisher} 目錄
在 {publisher} 目錄下,建立 {app} 目錄,例如:我的程式叫 just love radio,目錄名稱就是 just love radio。
在 {app} 目錄下,建立 {version}.yaml。{version}.yaml 每個不同版本都會有一份,例如:1.0.0.0.yaml,1.0.2.0.yaml
產生 yaml 檔案,可以 Tool 目錄中找到 YamlCreate.ps1,利用 Powershell 執行它來加以建立 yaml
目錄結構如圖範例:
準備好 {version}.yaml 可以發 git push 到自己的 repo
最後在自己的 winget-pkgs repo 發一個 PullRequest 到 microsoft/winget-pkgs 就完成了
建立 manifest 需要注意的地方,可以參考:Tips and best practices 。
Custom Powershell script to auto create YAML and send Pull Request to GitHub 上面介紹是手動處理方式,雖然步驟不多,但每次有新版本發布都要再做一次。
要自動化處理這些流程有幾個重要的組成元素:
準備可以檢查是否有新版的地方 不管是用 Jenkins 或其他 CI,建議準備一個地方紀錄目前最新版本的資訊,讓 script 可以檢查是否有新的版本要發給 winget。
1
2
3
4
5
6
7
8
9
10
{ "packages": [ { "version" : "10.0.2", "code" : 100002, "url" : "https://poumason.internal.com/jlr/100002.msi" }, ... ] }
自動檢查更新並產生 {version}.yaml 的內容 根據 Minimal required schema 定義,準備需要的參數,如下:
1
2
3
4
5
6
7
8
9
10
11
12
13
14
15
16
17
18
19
20
21
22
23
24
25
26
27
28
29
30
31
32
33
34
35
36
37
38
39
40
41
42
43
44
45
46
47
48
49
50
51
52
53
54
55
56
57
58
59
60
61
62
63
64
65
66
67
68
69
70
71
72
73
74
75
76
77
78
79
80
81
82
83
84
85
Write-Host "1. 從 https://poumason.internal.com/jlr/version.json 檢查是否有新版本" $response = Invoke-WebRequest -Uri "https://poumason.internal.com/jlr/version.json" $jsonObj = ConvertFrom-Json $([String]::new($response.Content)) $lastestVer = $jsonObj.versions[0].version $lastestUrl = $jsonObj.supports[0].url $previousVer = $lastestVer # 讀取本機的暫存檔,檢查上次抓到的版本跟最新的版本是否一致 $cacheFile = "..\.\winget_ver.txt" if(![System.IO.File]::Exists($cacheFile)){ SET-Content -Path $cacheFile -Value $lastestVer } else { $previousVer = Get-Content -Path $cacheFile } if ($previousVer -eq $lastestVer) { Write-Host "*** The same version ***" -ForeGroundColor Blue } else { # 準備一個新的 branch $branchName = "jlr-${lastestVer}" git branch -D $branchName git branch $branchName git checkout $branchName # 準備一個存安裝檔 $exeFile = ".\jlr-${lastestVer}.msi"; Write-Host "2. 下載 url 中的檔案 ${exeFile}" Invoke-WebRequest $lastestUrl -OutFile $exeFile Write-Host "3. 取得下載好檔案的 checksum ${exeFile}" $checkSum = (Get-FileHash $exeFile -Algorithm sha256).hash rm $exeFile Write-Host "4. 產生新版本的 ${lastestVer}.yaml" # publisherFolder 可根據自己的名稱與 App 名稱做改變 $publisherFolder = "poulin\jlr" $fileName = ".\manifests\${publisherFolder}\${lastestVer}.yaml" # 寫入 ID $string = "Id: poulin.jlr" write-output $string | out-file $filename # 寫入 Version $string = "Version: " + $lastestVer write-output $string | out-file $filename -append # 寫入 App 名稱 $string = "Name: Just Love Radio" write-output $string | out-file $filename -append # 寫入 Publisher $string = "Publisher: Pou Lin" write-output $string | out-file $filename -append # 寫入 License $string = "License: Copyright (c) Pou Lin All Rights Reserved." write-output $string | out-file $filename -append # 寫入 InstallerType $string = "InstallerType: msi" write-output $string | out-file $filename -append $string = "Installers:" write-output $string | out-file $filename -append $string = " - Arch: x86" write-output $string | out-file $filename -append $string = " Url: " + $lastestUrl write-output $string | out-file $filename -append $string = " Sha256: " + $checkSum write-output $string | out-file $filename -append # 加入 Silent 與 SilentWithProgress $string = " Switches:" write-output $string | out-file $filename -append $string = " Silent: /S" write-output $string | out-file $filename -append $string = " SilentWithProgress: /S" write-output $string | out-file $filename -append Write-Host "5. 更新暫存檔案到最新檢查的版本 ${cacheFile}" SET-Content -Path $cacheFile -Value $lastestVer Write-host GET-Content -Path $cacheFile Write-Host "6. 寫入 git commit 並送到自己的 winget-pkgs repo" git add $fileName $comment = "Add JLR new version ${lastestVer}" git commit -m $comment git push --set-upstream origin $branchName git push }
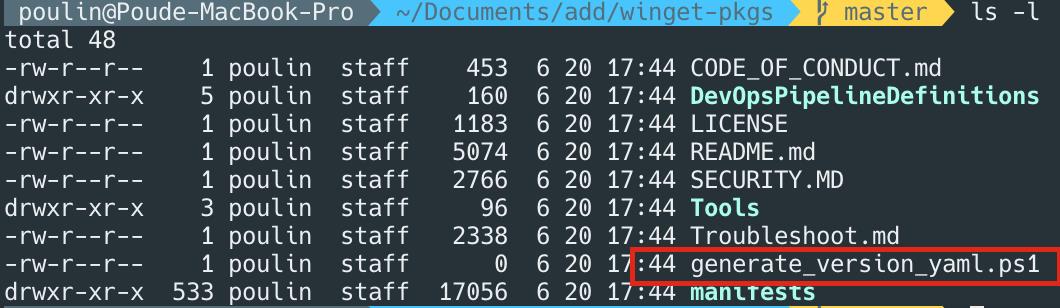
這個 script 需要被放在自己 GitHub 帳號下 clone 到本機的 winget-pkgs 根目錄 中,如下圖:
利用 GraphQL API 從自己的 winget-pkgs repo 發 Pull Request 給 microsof:winget-pkgs repo 要程式化發送 Pull Request 需要使用 createPullRequest - GraphQL API v4 ,根據 API 參數說明,我們需要:
Github Personal access token
microsoft:winget-pkgs repo 的 repo ID
利用 GraphQL API Explorer 輸入下面的指令得到 repo ID 1 2 3 4 5 { repository(owner: "microsoft", name: "winget-pkgs") { id } }
1 2 3 4 5 6 7 8 9 10 11 12 13 14 15 16 17 18 19 Write-Host "7. create pull request for GitHub" $graphql = "https://api.github.com/graphql" $accessToken = "{申請自己專用的 GitHub Access Token}" # microsoft:winget-pkgs 的 repo id $repoId = "{}" # 準備發送 api 的 http request headers $headers = New-Object "System.Collections.Generic.Dictionary[[String],[String]]" $headers.Add("User-Agent", 'Agent') $headers.Add("Authorization", 'bearer ' + $accessToken) # 把 $branchName 加入來源 $branchName = "{你的 github 帳號}:${branchName}" $body = '{ "query": "mutation { createPullRequest(input: { baseRefName: \"master\", headRefName: \"' + $branchName + '\", repositoryId: \"' + $repoId + '\", title: \"' + $comment + '\" , body: \"\"}) { clientMutationId} }" }' echo $body $response = Invoke-WebRequest -Uri $graphql -Headers $headers -Method 'POST' -Body $body echo $response git checkout master
https://github.com/microsoft/winget-pkgs/pull/1940 我發送的結果。
重新整理整份的 script: 1 2 3 4 5 6 7 8 9 10 11 12 13 14 15 16 17 18 19 20 21 22 23 24 25 26 27 28 29 30 31 32 33 34 35 36 37 38 39 40 41 42 43 44 45 46 47 48 49 50 51 52 53 54 55 56 57 58 59 60 61 62 63 64 65 66 67 68 69 70 71 72 73 74 75 76 77 78 79 80 81 82 83 84 85 86 87 88 89 90 91 92 93 94 95 96 97 98 99 100 101 102 103 104 105 Write-Host "1. 從 https://poumason.internal.com/jlr/version.json 檢查是否有新版本" $response = Invoke-WebRequest -Uri "https://poumason.internal.com/jlr/version.json" $jsonObj = ConvertFrom-Json $([String]::new($response.Content)) $lastestVer = $jsonObj.versions[0].version $lastestUrl = $jsonObj.supports[0].url $previousVer = $lastestVer # 讀取本機的暫存檔,檢查上次抓到的版本跟最新的版本是否一致 $cacheFile = "..\.\winget_ver.txt" if(![System.IO.File]::Exists($cacheFile)){ SET-Content -Path $cacheFile -Value $lastestVer } else { $previousVer = Get-Content -Path $cacheFile } if ($previousVer -eq $lastestVer) { Write-Host "*** The same version ***" -ForeGroundColor Blue } else { # 準備一個新的 branch $branchName = "jlr-${lastestVer}" git branch -D $branchName git branch $branchName git checkout $branchName # 準備一個存安裝檔 $exeFile = ".\jlr-${lastestVer}.msi"; Write-Host "2. 下載 url 中的檔案 ${exeFile}" Invoke-WebRequest $lastestUrl -OutFile $exeFile Write-Host "3. 取得下載好檔案的 checksum ${exeFile}" $checkSum = (Get-FileHash $exeFile -Algorithm sha256).hash rm $exeFile Write-Host "4. 產生新版本的 ${lastestVer}.yaml" # publisherFolder 可根據自己的名稱與 App 名稱做改變 $publisherFolder = "poulin\jlr" $fileName = ".\manifests\${publisherFolder}\${lastestVer}.yaml" # 寫入 ID $string = "Id: poulin.jlr" write-output $string | out-file $filename # 寫入 Version $string = "Version: " + $lastestVer write-output $string | out-file $filename -append # 寫入 App 名稱 $string = "Name: Just Love Radio" write-output $string | out-file $filename -append # 寫入 Publisher $string = "Publisher: Pou Lin" write-output $string | out-file $filename -append # 寫入 License $string = "License: Copyright (c) Pou Lin All Rights Reserved." write-output $string | out-file $filename -append # 寫入 InstallerType $string = "InstallerType: msi" write-output $string | out-file $filename -append $string = "Installers:" write-output $string | out-file $filename -append $string = " - Arch: x86" write-output $string | out-file $filename -append $string = " Url: " + $lastestUrl write-output $string | out-file $filename -append $string = " Sha256: " + $checkSum write-output $string | out-file $filename -append # 加入 Silent 與 SilentWithProgress $string = " Switches:" write-output $string | out-file $filename -append $string = " Silent: /S" write-output $string | out-file $filename -append $string = " SilentWithProgress: /S" write-output $string | out-file $filename -append Write-Host "5. 更新暫存檔案到最新檢查的版本 ${cacheFile}" SET-Content -Path $cacheFile -Value $lastestVer Write-host GET-Content -Path $cacheFile Write-Host "6. 寫入 git commit 並送到自己的 winget-pkgs repo" git add $fileName $comment = "Add JLR new version ${lastestVer}" git commit -m $comment git push --set-upstream origin $branchName git push Write-Host "7. create pull request for GitHub" $graphql = "https://api.github.com/graphql" $accessToken = "{申請自己專用的 GitHub Access Token}" # microsoft:winget-pkgs 的 repo id $repoId = "{}" # 準備發送 api 的 http request headers $headers = New-Object "System.Collections.Generic.Dictionary[[String],[String]]" $headers.Add("User-Agent", 'Agent') $headers.Add("Authorization", 'bearer ' + $accessToken) # 把 $branchName 加入來源 $branchName = "{你的 github 帳號}:${branchName}" $body = '{ "query": "mutation { createPullRequest(input: { baseRefName: \"master\", headRefName: \"' + $branchName + '\", repositoryId: \"' + $repoId + '\", title: \"' + $comment + '\" , body: \"\"}) { clientMutationId} }" }' echo $body $response = Invoke-WebRequest -Uri $graphql -Headers $headers -Method 'POST' -Body $body echo $response git checkout master }
再次強調這個 script 要放在跟自己 winget-pkgs 的目錄下,這樣才能正常執行。
在研究 GraphQL API 跟 Powershell 指令花了不少時間,感謝 Joe Wen 的幫忙讓我加快不少。
References